Content Menu
● Understanding Carbide Button Inserts
>> Types of Carbide Button Inserts
● Preparing for Insertion
>> Step 1: Gather Necessary Tools and Materials
>> Step 2: Choose the Right Size and Shape
● Inserting Carbide Button Inserts
>> Step 3: Create Holes in the Drill Bit
>> Step 4: Clean the Holes
>> Step 5: Apply Epoxy Adhesive
>> Step 6: Insert Carbide Buttons
>> Step 7: Allow Adhesive to Cure
● Best Practices for Inserting Carbide Button Inserts
● Common Mistakes to Avoid
● Conclusion
● Frequently Asked Questions (FAQs)
>> 1. What Are Carbide Button Inserts Made Of?
>> 2. How Do I Choose the Right Carbide Button Insert?
>> 3. Can I Insert Carbide Buttons Myself?
>> 4. What Should I Do If My Inserts Keep Falling Out?
>> 5. How Long Do Carbide Button Inserts Last?
Carbide button inserts are essential components in the drilling industry, providing the necessary durability and performance needed to tackle tough rock formations. Properly inserting these inserts into drill bits is crucial for maximizing their effectiveness and extending the lifespan of the tools. This article will guide you through the process of inserting carbide button inserts into drill bits, covering everything from preparation to execution, while emphasizing best practices and common pitfalls.

Understanding Carbide Button Inserts
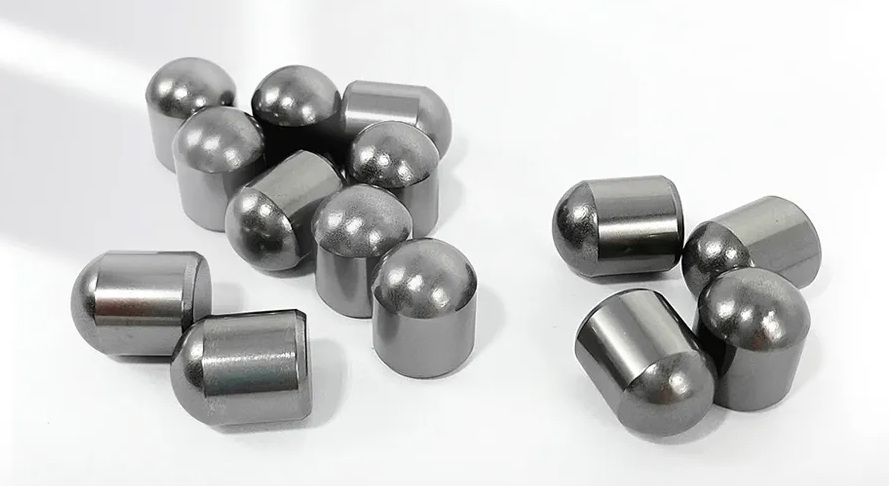
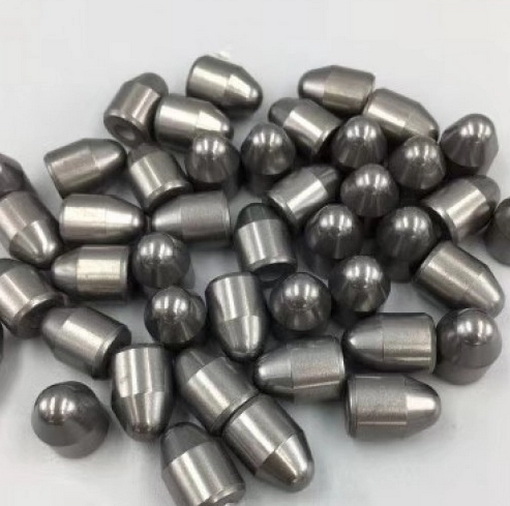
Carbide button inserts are small, round components made from tungsten carbide, known for their exceptional hardness and resistance to wear. These inserts are typically used in various drilling applications, including mining, construction, and water well drilling. The primary function of carbide button inserts is to enhance the cutting ability of drill bits, allowing them to penetrate hard rock formations more efficiently.
Types of Carbide Button Inserts
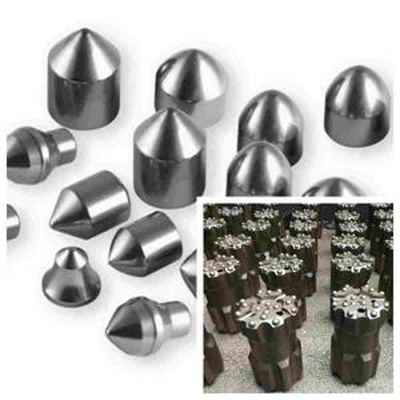
There are several types of carbide button inserts available, each designed for specific drilling conditions:
- Spherical Buttons: Ideal for soft to medium-hard rock formations, offering excellent penetration rates.
- Conical Buttons: Pointed inserts that provide superior performance in hard and abrasive rock formations.
- Parabolic Buttons: Combining the benefits of spherical and conical designs, these buttons offer good penetration rates and wear resistance.
- Hemispherical Buttons: Often used in the center of the bit face for added impact resistance.
- Ballistic Buttons: Truncated cone-shaped buttons that perform well in medium-hard to hard rock formations.
Preparing for Insertion
Before inserting carbide button inserts into drill bits, it's essential to prepare adequately. This preparation includes gathering necessary tools and materials and understanding the specific requirements for your drilling project.
Step 1: Gather Necessary Tools and Materials
To insert carbide button inserts properly, you will need:
- Carbide button inserts
- Drill bit press
- Epoxy adhesive
- Compressed air or a small brush
- Safety goggles and gloves
Step 2: Choose the Right Size and Shape
Selecting the appropriate size and shape of carbide buttons is critical. The choice depends on the drilling requirements and the type of rock being drilled. Ensure that the buttons fit snugly into the pre-drilled holes of the drill bit.

Inserting Carbide Button Inserts
Once you have prepared your tools and selected the right inserts, you can proceed with the insertion process.
Step 3: Create Holes in the Drill Bit
Using a drill bit press, create holes in the drill bit where the carbide buttons will be inserted. The holes should be slightly smaller than the diameter of the carbide buttons to ensure a tight fit.
Step 4: Clean the Holes
After drilling, clean the holes thoroughly using compressed air or a small brush. Removing any debris or dust is crucial for ensuring proper adhesion of the epoxy adhesive.
Step 5: Apply Epoxy Adhesive
Apply a small amount of epoxy adhesive to the base of each carbide button. This adhesive will help secure the buttons in place once inserted.
Step 6: Insert Carbide Buttons
Carefully insert each carbide button into its respective hole in the drill bit. Ensure that each button is seated securely and level with the surface of the bit. This step requires precision; improper seating can affect performance.
Step 7: Allow Adhesive to Cure
After inserting all buttons, allow the adhesive to cure for the recommended time specified by the manufacturer. This curing period is essential for achieving maximum strength and durability.
Best Practices for Inserting Carbide Button Inserts
To ensure successful insertion and optimal performance of carbide button inserts, consider these best practices:
- Precision is Key: Take your time during each step of the insertion process. Precision is crucial for ensuring that each insert performs effectively.
- Use Quality Materials: Always use high-quality epoxy adhesives and carbide buttons to avoid premature failure.
- Seek Professional Help: If you are unsure about any part of the process, consider seeking assistance from a professional technician with experience in inserting carbide buttons.
Common Mistakes to Avoid
While inserting carbide button inserts may seem straightforward, several common mistakes can lead to poor performance or premature failure:
- Improper Hole Size: Ensure that holes are drilled to the correct specifications; too large or too small can lead to loose or improperly seated inserts.
- Neglecting Cleanliness: Failing to clean holes adequately can prevent proper adhesion, leading to insert failure.
- Rushing: Take your time during insertion; rushing can result in misalignment or improper seating.
Conclusion
Properly inserting carbide button inserts into drill bits is vital for maximizing drilling efficiency and prolonging tool life. By following this comprehensive guide, you can ensure that your drilling operations remain effective even under challenging conditions. Remember that attention to detail during preparation and insertion will lead to better performance outcomes.

Frequently Asked Questions (FAQs)
1. What Are Carbide Button Inserts Made Of?
Carbide button inserts are primarily made from cemented tungsten carbide combined with a binding agent like cobalt or nickel. This composition provides them with exceptional hardness and durability.
2. How Do I Choose the Right Carbide Button Insert?
Choosing the right carbide button insert depends on factors such as rock type, drilling speed, and depth requirements. Spherical buttons are suitable for softer rocks, while conical buttons work better in harder formations.
3. Can I Insert Carbide Buttons Myself?
Yes, you can insert carbide buttons yourself if you have the right tools and follow proper procedures. However, if you lack experience, it may be wise to seek professional assistance.
4. What Should I Do If My Inserts Keep Falling Out?
If your inserts keep falling out, it may indicate improper seating or inadequate adhesive application. Ensure that holes are clean and that you use enough high-quality epoxy adhesive during insertion.
5. How Long Do Carbide Button Inserts Last?
The lifespan of carbide button inserts varies based on factors such as drilling conditions, frequency of use, and maintenance practices. However, when properly installed and maintained, they can last significantly longer than standard cutting tools.


