Content Menu
● Understanding Carbide Tips
>> Why Replace Carbide Tips?
● Tools and Materials Needed
● Step-by-Step Guide to Replacing Carbide Tips
>> Step 1: Remove the Old Carbide Tips
>> Step 2: Prepare for New Tip Installation
>> Step 3: Install New Carbide Tip
>> Step 4: Allow to Cool
● Maintenance Tips for Prolonged Life
● Conclusion
● Related Questions
>> 1. How often should I replace carbide tips on my saw blades?
>> 2. Can I replace carbide tips myself?
>> 3. What type of flux should I use for brazing?
>> 4. How do I know if my carbide tips are worn out?
>> 5. Is it worth it to replace carbide tips instead of buying new blades?
Replacing carbide tips on saw blades is an essential maintenance task that can significantly extend the life of your cutting tools. Whether you're a professional woodworker or a DIY enthusiast, understanding how to properly replace carbide tips can save you time and money. This comprehensive guide will walk you through the process step-by-step, ensuring that you can execute this task with confidence.

Understanding Carbide Tips
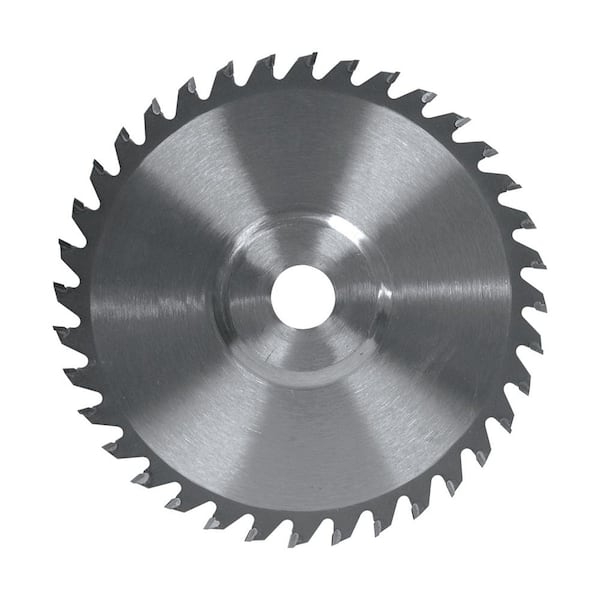
Carbide tips are made from a hard material that allows saw blades to cut through various materials effectively. Over time, these tips can wear down or chip, necessitating replacement. The process of replacing carbide tips involves several steps, including preparation, removal of old tips, and installation of new ones.
Why Replace Carbide Tips?
1. Cost-Effectiveness: Replacing carbide tips is often cheaper than purchasing new saw blades.
2. Improved Cutting Performance: Fresh carbide tips can enhance the quality of cuts and reduce the effort required during operation.
3. Environmental Impact: Extending the life of your tools reduces waste and promotes sustainability.
Tools and Materials Needed
Before starting the replacement process, gather the following tools and materials:
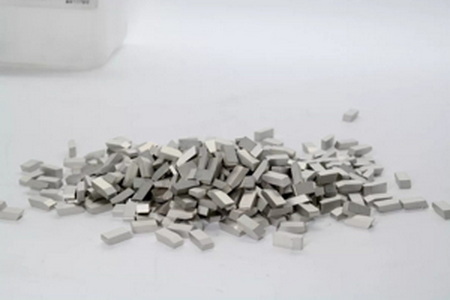
- Replacement Carbide Tips: Ensure they are compatible with your saw blade.
- Brazing Flux: Essential for creating a strong bond between the carbide tip and the blade.
- Brazing Alloy: Used to secure the carbide tip in place.
- Propane Torch: For heating the blade and melting the brazing alloy.
- Pokey Stick or File: To adjust the position of the carbide tip during brazing.
- Safety Gear: Gloves, goggles, and a face shield for protection.

Step-by-Step Guide to Replacing Carbide Tips
Step 1: Remove the Old Carbide Tips
1. Heat the Blade: Use a propane torch to heat the old carbide tip until it becomes loose. Aim for a temperature around 800°F (427°C) to avoid damaging the blade.
2. Flick Off Old Tip: Once heated, use a sharp flicking motion to remove the old carbide tip. It should come off easily if heated sufficiently.
Step 2: Prepare for New Tip Installation
1. Clean the Surface: Ensure that the area where the new tip will be placed is clean and free from debris or old flux.
2. Apply Brazing Flux: Paint a thin layer of brazing flux onto the area where you will install the new carbide tip. This helps prevent oxidation during heating.
Step 3: Install New Carbide Tip
1. Position New Tip: Place the new carbide tip in position with the braze alloy side facing down against the flux.
2. Heat Again: Carefully heat the area around the new tip until you see the brazing alloy begin to melt. This typically occurs at around 1380°F (750°C).
3. Adjust Position: Use your pokey stick to gently nudge the carbide tip into place without pushing down too hard, which could squeeze out excess braze alloy.
Step 4: Allow to Cool
1. Remove Heat Source: Once properly positioned, gently pull away your torch while holding the tip in place until it cools down.
2. Inspect Joint: Once cooled, check that there are no gaps or misalignments in your newly installed carbide tip.
Maintenance Tips for Prolonged Life
To ensure longevity for your newly replaced carbide tips, consider these maintenance practices:
- Regularly inspect your saw blades for wear and damage.
- Keep blades clean and free from resin buildup.
- Store blades properly to prevent chipping or damage.
Conclusion
Replacing carbide tips on saw blades is a straightforward process that can greatly enhance your cutting efficiency and tool longevity. By following this guide, you can ensure that your tools remain in top condition without incurring high costs associated with purchasing new blades. Remember to always prioritize safety during this process and take care of your tools for optimal performance.

Related Questions
1. How often should I replace carbide tips on my saw blades?
Carbide tips should be replaced when they show signs of wear or damage, typically after several sharpening sessions or if cutting performance declines significantly.
2. Can I replace carbide tips myself?
Yes, with proper tools and safety precautions, replacing carbide tips is a task that can be performed by most DIY enthusiasts.
3. What type of flux should I use for brazing?
Use brazing flux specifically designed for high-temperature applications; avoid using soldering flux as it cannot withstand higher temperatures required for brazing.
4. How do I know if my carbide tips are worn out?
Signs of wear include chipping, dullness, or difficulty cutting through materials that were previously easy to cut.
5. Is it worth it to replace carbide tips instead of buying new blades?
Yes, replacing carbide tips can be more cost-effective than purchasing new blades, especially if you regularly maintain your saw blades.


